 |
|
|
Article text as originally appeared in the Ford Galaxie Club of America September/October 2001 and November/December 2001 issues of the Galaxie Gazette. Photos and links added as indicated.
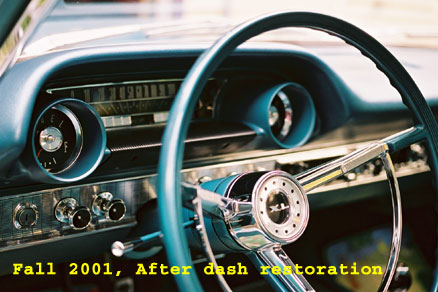
1963 Galaxie 500 XL Dashboard Restoration
OUTLINE
1. Preparation
2. Removal and Teardown
3. Heater Plenum
4. Firewall
5. Steering Box
6. Dash Shell
7. Steering Wheel
8. Instrument Cluster
9. Wire harness
10. Dashpad
11. Windshield Wiper
12. Aluminum Finish Panels
13. Bezels
14. Painting
15. Addresses
| This restoration work description is of interest to persons preparing
or in the process of restoring a 1963 Galaxie 500 XL or similar. The focus
here is on the repair and restoration of the dashboard and other related
parts such as the instrument cluster, heater plenum, steering wheel, aluminum
finish panels and windshield wiper system. More detail will be covered
on the more difficult tasks and less or none on the routine. The information
is useful in a greater sense as many different types of materials are used
in the dashboard. This description is based on my experiences in completing
a 1963 Galaxie 500 XL dashboard restoration project, part time, over a
ten month time period. The goal was to make everything dash-related work
and look factory new. I think this goal has been achieved, not perfectly,
perhaps a 9.5 out 10. But the original factory manufacture of these cars
were not perfect either, witness for example the glove box door fit. I
gave up trying to make a perfect flush-faired fit between the glovebox
door and adjacent dash finish panels after seeing many other 63 Galaxies
500s or XLs with the same inherent problem. This was a very thorough and
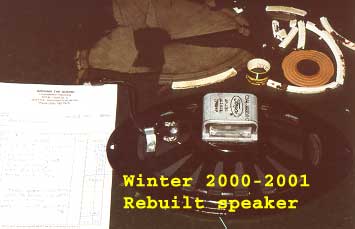
detailed job that even included disassembly and painting of the ash tray
details and restoration and reconing of the factory radio speaker. Speaker
parts were only $19 from Around The Sound Loudspeaker Reconing. The old
parts were matched up and I did the reassembly
job. The original speaker performance is adequate when the AM factory
radio is retained, as in this case, but for modern sound equipment it obviously
won't do.
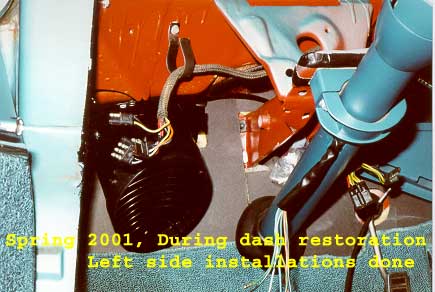
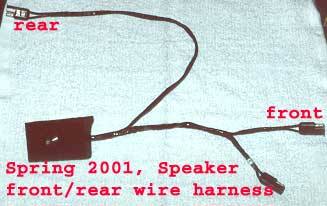
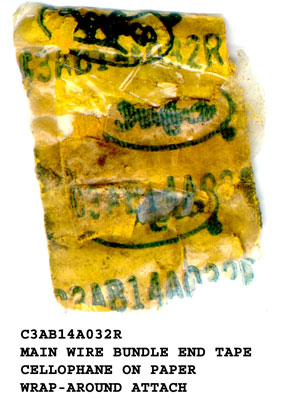
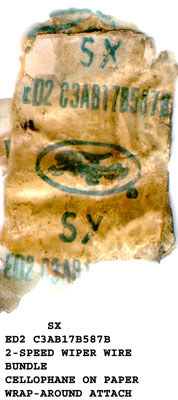
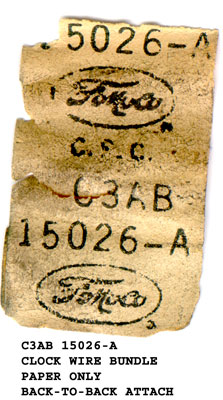
Preparation. Over the years I have tried to keep everything on the car and dash in proper working order. The upkeep has been fairly easy to do as very little broke down and required repair. The clock was converted to quartz over ten years ago and still works perfectly. Fuel, Speed and Temp gauges work fine. However the cosmetic appearance of many of the parts had gradually deteriorated to the point of looking quite awful - especially the roasted, cracked and faded dashpad. So from a driver's visual perspective, now it was time to restore these most visible parts of the car. I started by purchasing a 63 Ford Single Year Parts Book, PB-63, $54.95, from Greg Donahue Collector Car Restorations. This book was a huge help in locating parts, especially when doing computer searches via the Internet. The dashpad was purchased in advance from Just Dashes. Experimentation with the decorative aluminum finish panels was started over a year ahead of time. Various parts to be replaced were purchased from ebay auctions and swap meets as they became available. I generally kept an eye out for parts that were not available from usual catalogue sources. The best find was an NOS brake pedal pad for the XL that had no competing bidders. This was also a handy method for picking up bezel cores to be replated. This parts collection could be done in advance of tearing the dash out so I could still take pleasure in driving the Galaxie. Removal and Teardown. Late September 2000 had arrived and with it the usual cooler wet weather so it was time to start removing the dash. This is a list of what was removed for restoration: Steering wheel, column and box, dash shell and attached contents, heater plenum, brake pedal hanger bracket, gas pedal and linkage, dash wire harnesses, side kick panels, parking brake, wiper motor and transmission arms, firewall insulation pad and cowl vent stove pipes. The surprise here was the large number of individual metal pieces to be worked and refinished. After an initial effort to leave the heater plenum interior doors and deflectors intact it was clearly going to be necessary to disassemble it for restoration. After tearing large assemblies down to the bare details the steel parts were cleaned and epoxy primered with PPG products DP74LF red oxide. Powder coating would be a good alternative for protecting otherwise bare metal surfaces. I found an excellent citrus based parts cleaner called De-Solv-it that could be safely used inside the house for the cleaning of many small metal parts such as screws, control knobs, etc. De-Solve-it can be found in the grocery store laundry soap aisle. Vons or Albertsons on the West Coast stock it. De-Solv-it will strip oil, grease, light corrosion and loose paint. Heater Plenum. The heater plenum was the first major assembly to be worked on. At the time of general dash teardown I had purchased a large assortment of heater related parts from Greg Donahue, including a new heater core, tube grommets, fresh air duct and heater box (plenum) seal kit. An area of difficulty was with finding correct tubular rivets to reassemble the refinished doors and deflectors after gluing on the anti-rattle foam pieces. As a substitute I used blind pop rivets. In some cases the rivet center stud was clipped off and removed, and this allowed the rivets to be installed like tubular rivets using a couple of brass drifts. Where the rivet heads were visible, quick setting epoxy was used to fill the center hole to make it look like an original tubular rivet. Where the back of the rivet was visible or required to fit flush, these were installed without the center stud and lightly hammered into place with the brass drifts on each side, after painting the plenum (XL only) all the rivets look very original. Lots of photographs all around the plenum were taken before disassembly to aid in putting everything back to original appearance. 3M strip caulking was used between the rear cover and plenum to prevent rattles and air leaks. On the XL there is also an extension that goes over the console and it was originally assembled onto the plenum with blind rivets so that was no problem putting it back on as original. The heater box (plenum) seal kit - , C3AZ-18500A was of excellent quality. One minor disappointment was with the reproduction fresh air duct, C0AF-18A594A, (cowl-to-heater plenum connector). This rubber accordion like part was assembled incorrectly with the base metal plate reversed 180 degrees from the correct asymmetric position. And the metal plate had no protective paint. But these glitches were easily fixed. The rubber portion however is a much better material than original and should last indefinitely. Firewall. Restoring the sheet metal was routine. Nothing too difficult about this other than a thorough cleaning, spot rust removal, unused hole filling with PC-7 epoxy and PPG red oxide epoxy primer painting. Reproduction insulation pads are available but I chose to make my own. Using the remainder of the original as a pattern I made a reproduction pad. A sandwich was created consisting of layers of waterproof black panelboard, Dynamat sound deadener and fiberglass. This combination worked out well in keeping engine sound and heat out. The completed pad was split in two in a manner same as the original to clear the steering column. Perforations were also cut in the pad, matching the original pattern, near the gas pedal hole and transmission tunnel to allow some flexing to fit the irregular firewall contour there. The column and base plates go back in first. The pad was installed using plastic fastener studs in place of the metal originals, which weren't available as reproductions at the time, if you can find or salvage the metal type these do grip better than the plastic types. On the engine side of the firewall, the heater fan motor cover was removed, strip caulked and reinstalled. Steering box. Wanting to keep my original parts I elected to rebuild rather than exchange my steering box. It is a big greasy mess to gut and clean it however. With over 300 thousand miles on this box the only real problem was the grease getting too dry on the top end and some leakage from the bottom shaft seal. It sits very close to the exhaust manifold and gets cooked. The 63 box is easily disassembled, you just have to go rent a large 3 1/8 six point socket or other suitable tool to remove the adjuster locknut, then unscrew the adjuster. The outer surfaces of the casting were sandblasted, epoxy primered, colored with Eastwood Spray Gray and clearcoated with flattened DAU 75 urethane clear. Steering shaft end bearings and both shaft seals were replaced. With a new cover gasket and fresh grease assembly was routine per the factory shop manual. Dash Shell. Routine clean and paint. Color, durability and gloss matching was the concern here during refinishing. The correct paint color code for PPG products was only available for DIA lacquer. A custom mix of enamel was made but was not used due to unsatisfactory color matching (dark metallic turquoise). The lacquer was used instead and was top coated with PPG DAU 75/DXR 80 urethane clear, plus hardener mixed with DX 685 urethane flattening agent. This worked very well to achieve original appearance and durability. This same color and clearcoat was also applied to the other color matched parts except the steering wheel. Steering Wheel. Here toughness and appearance are top priority because of the close and tactile use of the steering wheel. Color matching was secondary so I chose to use a totally different refinishing method compared to the other color keyed parts. Available from Eastwood is the Steering Wheel Restoration Kit. The kit consists of The Steering Wheel Restoration Handbook by Jack Turpin and 2-part PC-7 epoxy. It is easy to follow and do but requires a great deal of time and patience. Start early and set aside for days or weeks. Windex was used for cleaning and pre-paint prep. After making the per book usual stress crack repairs I chose not to use lacquer for the final top coat. Instead I seal coated the Evercoat Feather Fill polyester primer with thinned PPG light green epoxy primer and color coated at full gloss with one coat PPG Concept DCC acrylic urethane. This paint worked out very well and has not scratched or chipped after 2,000 plus miles of summer driving. A sample of the lacquer previously used on the other parts was sprayed out onto a test sheet and then scanned by the paint dealer to computer mix a pint of matching DCC. This paint and color has excellent depth and beauty. The paint color behaves differently than the flattened lacquer causing the wheel to appear slightly lighter or darker depending on the type, angle and intensity of the light source. This difference however is not much more than with the original wheel. For a frequently driven car this is preferable over repeating the original poor adhering lacquer job that tended to flake and fall off into your hands on long hot driving days. The urethane paint has the flexibility to give with the bending of the hard rubber wheel. Instrument Cluster. These components were in good operating condition to begin with. The clear plastic lenses for fuel temperature and speedometer required some extra work to restore to a like-new appearance. Via swap meets and other used parts sources, some instrument clusters were obtained for the purpose of salvaging restorable lenses. The original fuel and temp lenses were crazed and not restorable. Many of the other used lenses had some small cracks emanating from the letters. I had to find fuel and temp lenses that were crack-free. Member Bill Logan, of Olympia WA., supplied me with a cluster that had good crack free lenses. Just one problem though, there were plenty of scratch marks. These were too deep to be polished out so I used 2000 grit wet sandpaper to smooth away the scratches and then followed up with sufficient plastic cleaner, Mirror Glaze 17, to restore the lens transparency. By this time most of the white paint in the recessed letters had gone away. After a thorough cleaning with Windex, I used water based acrylic craft paint to redo the lettering. Typically this paint can be found in fabric and art craft stores in a 2 ounce bottle. This paint is easy to apply, dries fast and excess is easily trimmed off matching original appearance. Don't use a solvent based paint such as Testors model paint, it will attack the clear plastic lens and can not be corrected if applied outside the letter borders. The lenses were finish-polished with Mirror Glaze 10, resulting in brand new appearance. All polishing was done by hand, as some earlier experiments with power polishing resulted in surface burns on the heat sensitive plastic. Do not be too aggressive in cleaning the odometer numbers. The painted numbers on the plastic wheels are delicate and will easily flake off. A light swabbing with a wetted cotton tip is sufficient to clean the odometer numbers. If necessary, the numbers paint can be touched up using a magnifier and a Koh-I-Noor Rapidograph pen loaded with India ink. On the back of the speedometer housing is the metal turn signal flasher bracket, which is very brittle and easy to damage. Some of the blue lenses that color the instrument illumination were melted or burned. These and other parts were salvaged from some of the spare clusters as required. All other instrument cluster detail components were cleaned and restored routinely. Wiring harness. Except for some unraveling at a few tape ends, the original wire harness was relatively undamaged. The one exception was the high/low beam selector switch connector. This connector almost had to be replaced due to high heat damage and replacements are available if required. The high/low beam foot operated switch was very corroded internally and not salvageable and I am surprised that the headlights worked at all considering the poor condition and high resistance at this point in the headlight circuit. Even if you have a headlight relay installed the signal current still has to pass through this dimmer switch. This is an item that ought to be replaced on all cars of this age for fire safety consideration and to keep the headlight circuit from drawing too much current or eventually, becoming an open circuit. The accessible wire harnesses were unplugged, removed from the car and cleaned. The rear harness assembly that routes under the carpet and along the tunnel was not removed. There are three separate removable wire harnesses. The main harness stretches from the high/low beam connector, door jamb switches, through the fuse panel with tape wrapping that terminates at the heater plenum connector, a short harness from the wiper switch to wiper motor and a clock wire harness. A fourth harness I constructed in a like manner to the factory harnesses to replace the cobbled together dealer installation of the rear speaker wire and fader switch connections (was very poor grade clamped on splices and fabric insulated wire). All the black wire wrap tape is non-adhesive type and was in good shape except at the tape ends. All wire harness taping terminated with an adhesive backed part number tape. The original labels are as fragile as cobwebs. These labels I duplicated as much as practical using the computer printer and backed with clear packing tape. Wire harness part number labels are: C3AB144032R - color yellow with blue letters, main harness near the heater plenum connector, E02 C3AB17B587B color white with blue letters, 2-speed wiper switch to motor harness and C3AB 15026-A - color white with black letters for the clock harness. All original labels contained a Fomoco logo. I went to the WWW and explored the Internet looking for ways to chemically clean copper and find a gentle solution to restoring good clean electrical connections throughout but with particular attention to the fuse panel. White vinegar mixed with a few other kitchen supplies suffice to make a very good cleaner. The smell is overpowering at first and then you can't smell it anymore. The fuse block copper tangs were restored to a bright shiny like new surface again. After cleaning, rinsing and drying, the metal connection surfaces were then protected with a light coating of aerosol electrical tuner lubricant. Be sure and also clean the 2 separate terminal blocks that connect to the turn signal and horn wires. I accidentally skipped these and later had an open circuit result. Dashpad. This was a no-win situation. If this were a show car only use and not a driver I would have just converted to a metal dash surface and forget it. Instead, for my family driver car, I purchased from Just Dashes a reproduction safety dashpad - $445. As a backup plan, I also bought a plastic dash cover from Greg Donahue after discovering some fit problems with the Just Dashes dashpad - $99.95. And if the original dashpad were not so badly uplifted, shrunk and distorted I would have gone with the plastic dash cover, its just that additional work would have to be done to provide a good base. The construction of the Just Dashes dashpad is outstanding but the fit, in this case, was not good. Lengthwise it was exactly correct, but from the leading edge forward toward the speaker and defrost hole cutouts it was short about an inch. This is with heavy pressure applied, indoors and at warm room temperature to ensure it was pliable. After substantial internal cutting and modification I made it fit correctly. The dashpad does not come with the hidden front metal brace attach strips and I transferred over my old parts from the original dashpad. To do this you just peel back the vinyl, trim for the attach fasteners, use contact cement and glue the metal strips in. Regarding the poor fit, I don't see how anyone with less than with gorilla strength could have installed this dashpad without modifications. I was convinced that the metal dash shells differ between the 63 and 64 model years as a result of learning that the tooling for the dashpad was derived from a 64 Galaxie. I researched this theory in the salvage yard where 63 and 64 Galaxies were examined, took photographs, but was unable to prove this. Dash shell part numbers are different but that may be due to the relocation of the ignition switch. So it is a mystery why this otherwise fine product fit so poorly. To be fair - a sampling of other 63 Galaxie owners, who have a Just Dashes dashpad, have not reported this same level of poor fit. The only way to settle the question conclusively would be to take a correct fitting used 64 dashpad and try to fit it on a 63 and see if the fit differs substantially or dredge up copies of the Ford engineering drawings. Windshield Wiper. All windshield wiper system parts were removed, disassembled and restored as much as practical. The under cowl mechanical transmission arms and output links were replaced with NOS. The cover/gasket/park switch, dash wiper switch and underdash circuit breaker were replaced with NOS. The motor armature commutator end was inspected and cleaned. The gearbox was reshimmed to shop manual specifications using parts from a spare motor. The steel bracketry and armature cover were stripped and painted with black POR-15. NOS cushioned isolator nuts were installed into the motor bracket assembly. The motor assembly was reinstalled using 3M 08610 1/4 inch polybutyl Window Weld rope seal to seal out water from the cowl vent chamber. This area will leak without caulking. This heavy plastic like caulking was also used to install and seal the cowling "stovepipe" air vents. The rubber wiper motor gasket alone will not seal out the water because the offset of the insulator nuts prevent it from pressing tight against the cowl. The wipers worked well on the rainy ride to Hillsboro last June except for one NOS part that was apparently tagged incorrectly. The 2 inch long NOS arm that was fitted onto the output shaft was too short by a fraction of an inch and this resulted in only 3/4 normal sweep of the windshield. The output arm was replaced with a good used part and full sweep was restored. |
 |
 |